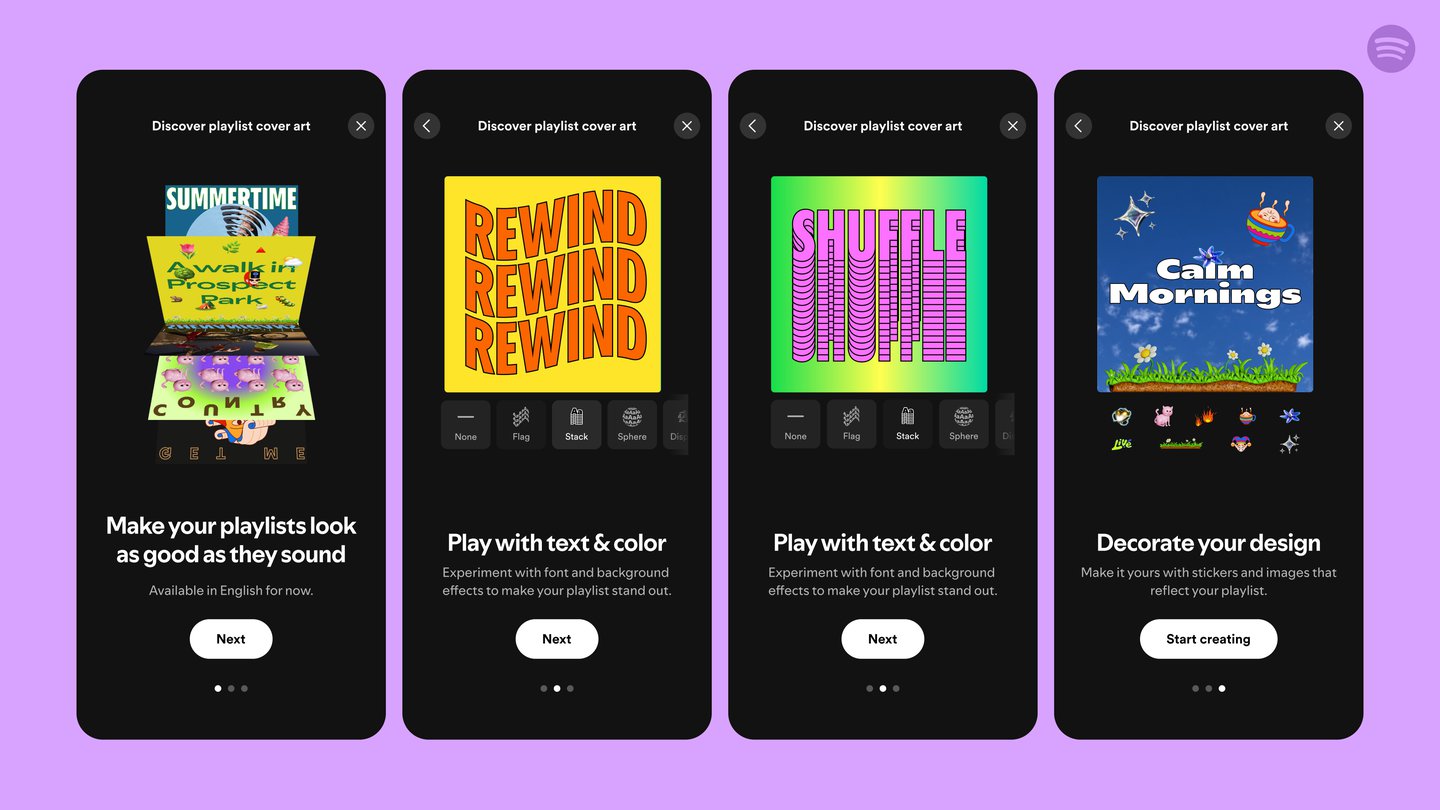
Creating eye-catching cover art for your Spotify playlists can enhance the overall aesthetic and make your playlists more appealing to listeners.
In this tutorial, we’ll guide you through the process of creating custom playlist cover art, both using Spotify’s built-in features and external design tools.
Method 1: Using Spotify’s Built-In Feature
Step 1: Open Your Spotify App
- Launch the Spotify app on your mobile device (available on both iOS and Android).
Step 2: Select Your Playlist
- Navigate to the playlist for which you want to create cover art. Tap on the playlist to open it.
Step 3: Access the Menu
- Tap on the three-dot menu (•••) located at the top right corner of the screen.
Step 4: Choose “Edit Playlist”
- From the dropdown menu, select “Edit Playlist.”
Step 5: Create Cover Art
- Look for the option labeled “Create cover art.” Tap on it to start designing.
Step 6: Customize Your Cover Art
- Upload an Image: You can upload an existing image from your device.
- Use a Blank Canvas: If you prefer starting from scratch, choose a blank canvas.
- Add Text: Use the text tool to add a title or description. Customize the font style, size, and color.
- Incorporate Stickers/Graphics: Explore available stickers or graphics to enhance your design.
Step 7: Save Your Artwork
- Once you’re satisfied with your design, save it. Your new cover art will automatically update for your playlist.
Method 2: Using External Design Tools
If you want more creative freedom or advanced design options, consider using external graphic design tools. Here’s how to do it:
Step 1: Choose a Design Tool
Select a user-friendly graphic design tool. Some popular options include:
- Canva (www.canva.com)
- Adobe Spark (spark.adobe.com)
- BeFunky (www.befunky.com)
- Picmaker (www.picmaker.com)
Step 2: Set Up Your Canvas
- Open your chosen design tool and set up a new project. The recommended dimensions for Spotify cover art are 3000 x 3000 pixels.
Step 3: Design Your Cover Art
- Background: Choose a background color or image that reflects the theme of your playlist.
- Text: Add text elements such as the playlist title. Experiment with different fonts and styles.
- Graphics/Images: Incorporate relevant images or graphics that align with your playlist’s mood or genre.
- Layering: Use layers to position elements effectively, ensuring everything is visually balanced.
Step 4: Download Your Artwork
- Once you’re happy with your design, download it in a high-resolution format (preferably PNG or JPEG).
Step 5: Upload to Spotify
- Open the Spotify app and navigate to your playlist.
- Tap the three-dot menu (•••) and select “Edit Playlist.”
- Tap on “Change Image” and upload your newly created cover art from your device.
Tips for Creating Engaging Cover Art
- Keep It Simple: Avoid cluttered designs; simplicity often leads to more impactful visuals.
- Use High-Quality Images: Ensure any images used are high resolution to maintain quality when displayed.
- Reflect Your Playlist’s Theme: The artwork should give listeners an idea of what to expect from the playlist.
- Experiment with Colors: Use colors that evoke specific emotions related to your music selection.
Creating custom cover art for your Spotify playlists is a fun way to express creativity and enhance listener engagement.
Whether you use Spotify’s built-in feature or external design tools, following these steps will help you craft visually appealing artwork that represents your musical selections perfectly.
So go ahead, unleash your creativity, and make those playlists stand out!


